

When it comes time to decorate our house We like to use something a bit more unique, something creative, something we made. Our decorations don’t have to be fancy or expensive. In fact, we love when we see some innovative twists on basic decorations. As they inspire us to comes up with something new for our house each year.
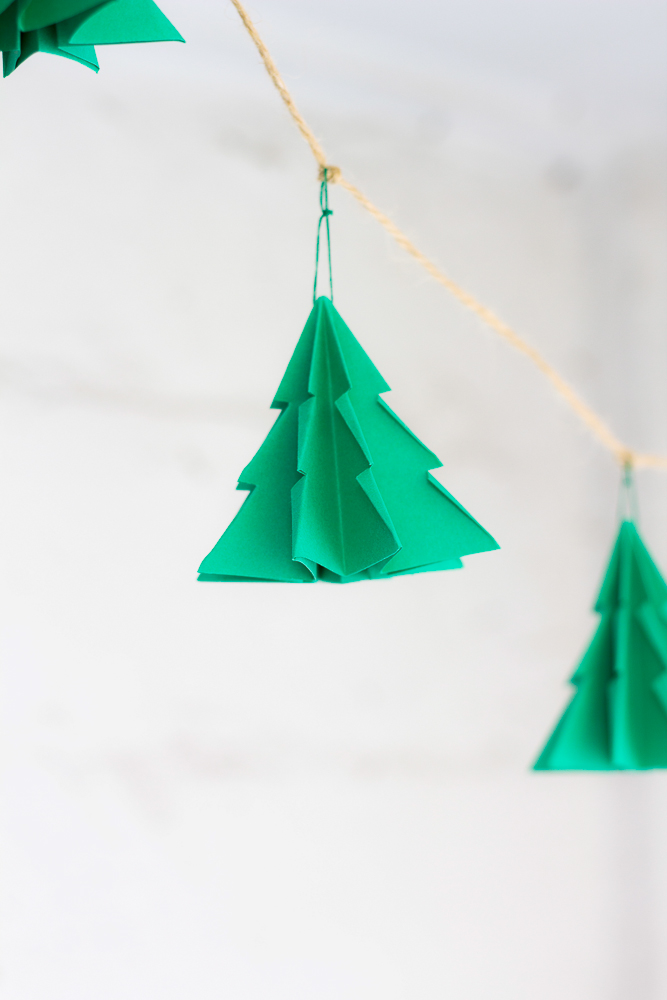
No place for a Christmas tree at home? This simple Christmas Tree Garlands will be the easiest and simple this to put at your home. Garlands can be more fun as an adult to make than it was as a child making garlands out of construction paper. Garland making is pretty simple and can make for a fun Girls Night In. All you have to do is gather a bunch of garland making supplies, a few bottles of wine, and girlfriends for a fun night of holiday cheer and creativity. Some eggnog and Christmas cookies might help, too.
We’ve got the tutorial on how to make your own adorable, old-fashioned garland. To create this you might need a bunch of tips and tricks. As it isn’t as easy as you might think! Plus, how to keep it fresh for years.
- To store garland tangle-free, carefully wind them around cardboard wrapping paper tubes.
- Garland has more impact when it is doubled up.
All you need for this project is some construction paper and strings. Start by cutting the paper into a square, the bigger your square is the bigger you got. Start by creating guiding lines by folding the paper in half in both horizontal and vertical way.
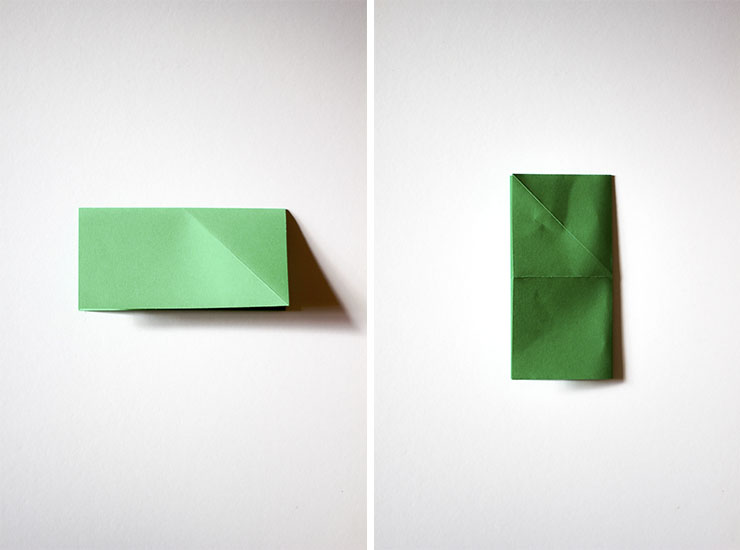
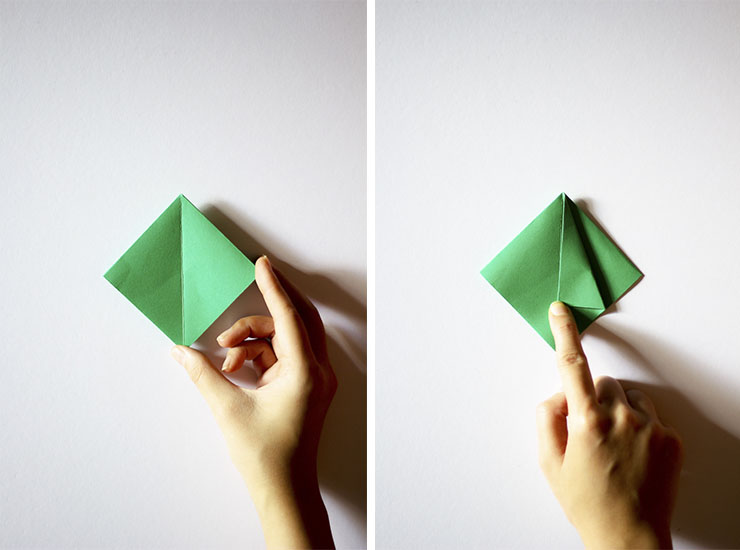
To create a more guiding line by folding into a triangle allowing your to have a perfect Christmas Tree. Leave the paper in a triangle shape. This time hold onto the center line and fold in making a square. Do it on the other side.

On this small square, fold the sides into the center line, creating a small triangle. Do in on both sides for the front and back.
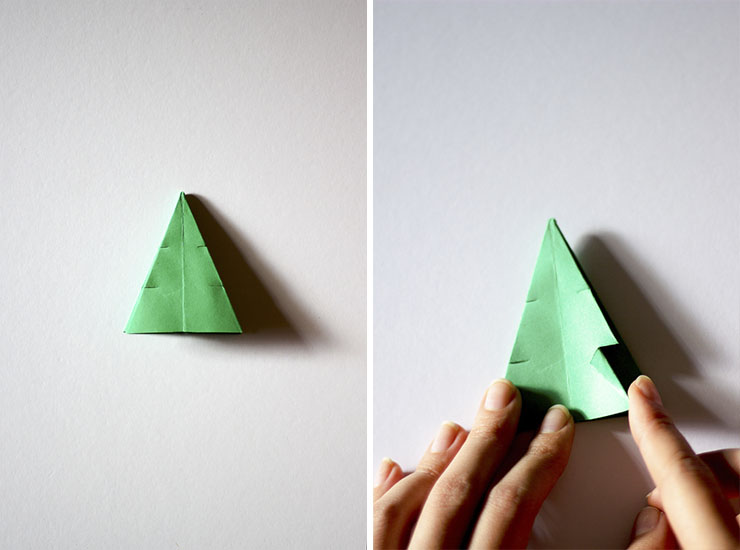
Cut away the extra parts leaving the folding triangle. When doing with kids please supervise them and be careful with the scissors.

Here comes the tricky part, stuck in the triangle to form a square back.

Make 3 symmetrical cuts at the two sides and start folding one after another. Fold it slightly to create the tree shape. Do it for the bottom 2 slot for all sides. And now you are off to go.
String it up equally to create this beautiful garland or you can make different sizes and color, leaving it as a centerpiece for your table. This garland may require you sometime yet you won’t regrets as the result will be stunning.


Decorating for Christmas is always more fun with friends, so stay tuned for more post on the food you can make for your Christmas party! And, best of all, after the holidays, you can carefully wrap up the garland and display it again next year.
Share with us your making! Take a photo of yours, send us an email, tag us on Instagram, tweet us, anything. We love to see yours!
xoxo, Joe


1 Comment
Moodboard | – LePlainCanvas
03/12/2020 at 2:42 am[…] want to create an atmosphere that invites you to curl up in a blanket and enjoy all the beautiful DIY Christmas decorations you made yourself. Think: mini trees draped in plaid fabric, sweet signs made from vintage-worn […]