

We have a treat for all the ladies and lover today. A recipe for a homemade gift you’ll that’s perfect for pampering the ones you love – Rosa Bath Bombs!
These little treats pack a powerful punch when added to a warm bath. Place them under running water and they’ll dissolve and fizz and create a wonderful soaking environment. Even if you don’t have a bathtub, these bath bombs can still be effective in a shower. The water will help dissolve the bath bomb and release the aroma of the essential oils into the steam. Best yet, you can add whichever scents you choose.
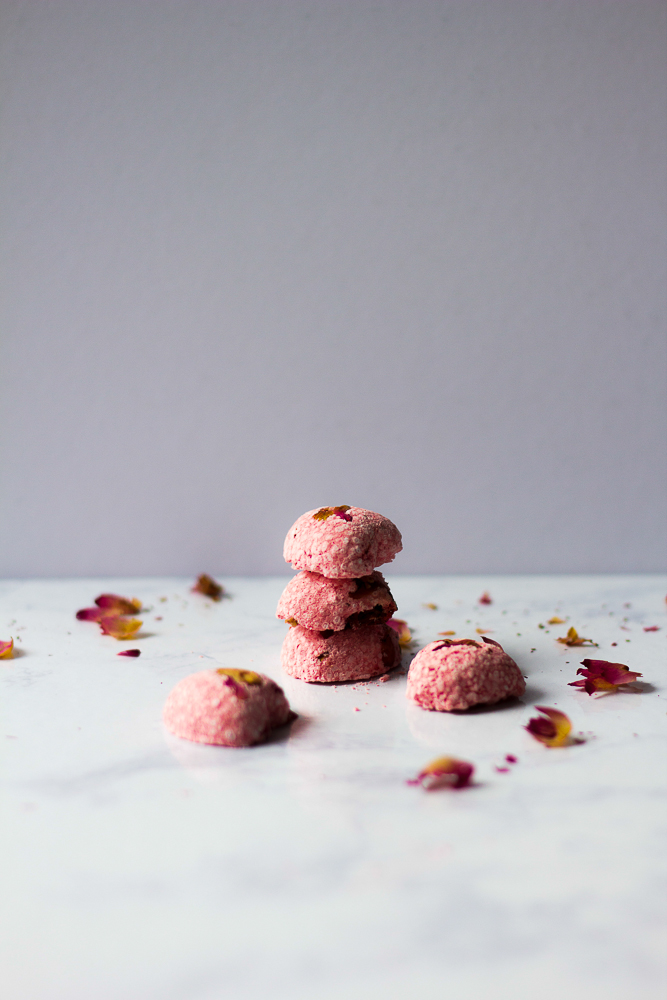
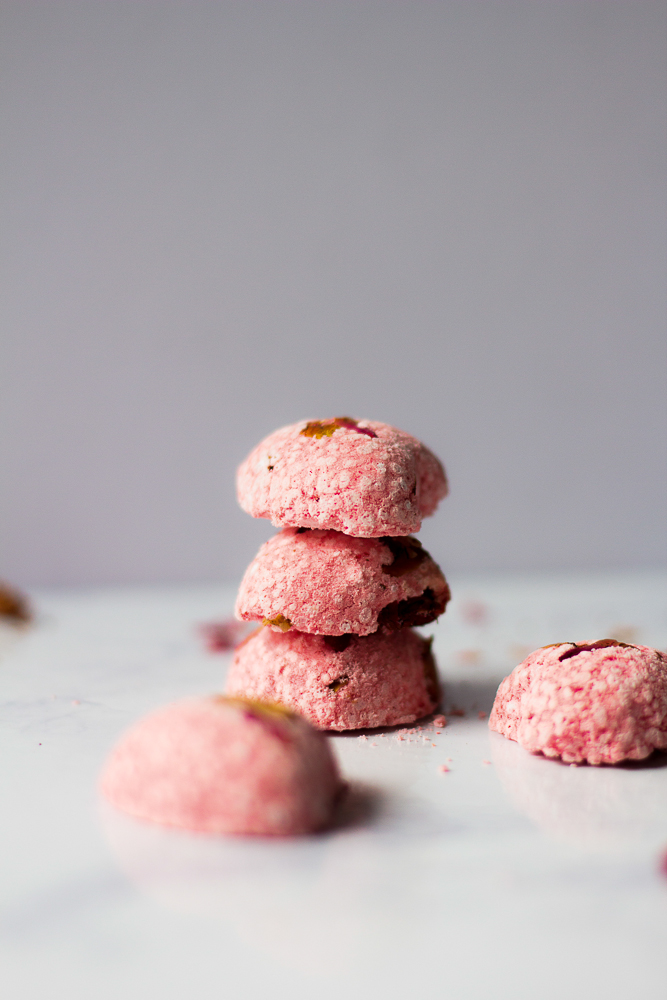
Since it is for Valentine’s Day, we used roses because it’s romatic and invigorating. All also we make them into small little heart, using the silicon heart molds. It will be really lovely when you see little hearts floating in the water.
Actually, we went to make some of these around last year and a couple different tutorials we tried did not produce very good results. But hey, if at first, you don’t succeed, sometimes you just have to try again.
Now that I’ve found a method/recipe that works, I’m thinking I should have some friends over for a make-your-own-bath-bombs party. Added bonus: It seriously makes your whole room smell amazing while you make these! However for now, let’s make some for our lover first!
Ingredients |
- 1 cup baking soda
- 1/2 cup Citric Acid
- 10 drops essential oil (we used Rose)
- 1/2 tbsp of carrier oil (such as Jojoba, Almond, or even coconut oil like us)
- spray bottle with water
- rose petals
- gel food coloring (totally optional)
- silicone mold
Method |
In a medium bowl, mix together the baking soda and citric acid. You can strain them through a sieve for a finer consistency if desired.
In a small bowl, stir together your carrier oil and essential oil. Add to the medium bowl of powders and stir until well mixed. Add mica powder for coloring if desired.
Using a spray bottle of water, mist the surface until slightly damp. Mix until it’s the consistency of slightly wet sand— it should clump together when pressed. DO NOT OVER SATURATE! If it’s too wet it WILL fall apart when you are taking it out of the molds.
Pack into molds. I used both silicone for small heart shapes and a muffin tin for larger ‘pucks’. Be sure to add the mixture to the top of the mold and really pack it in there.
Cover mold with a paper towel, and carefully turn upside down over a baking sheet covered in another paper towel. Gently tap the bottom of the mold if needed, and unmold the bath bombs. Cover with paper towels and let dry overnight.
Package in an airtight container or bag so that your DIY bath bombs don’t lose their fizz, and enjoy!
We hope you like them! Share with us your version! Take a photo of yours, send us an email, tag us on Instagram, tweet us, anything. We love to see yours!
xoxo, Joe.


No Comments