
You may say we are one of those thrifty’s girls, both of us love pretty and cute little things from accessories to household needs, however, times we just never want to spend extra money on things if we can save a penny. However the ultimate reason is since young, we love making things on our own with the influence of our mom.
It has been fun making things with her, she is creative and a talent handywoman. She always tell us, “we’ll just keep on trying it even if we failed, at the end of the day you will just gain knowledge from your failure”. She taught us to be innovative, sometimes we laugh at her silliness on her creation but surprisingly it just works! We appreciated that she gave us all the freedom and lead us to where we are right now.
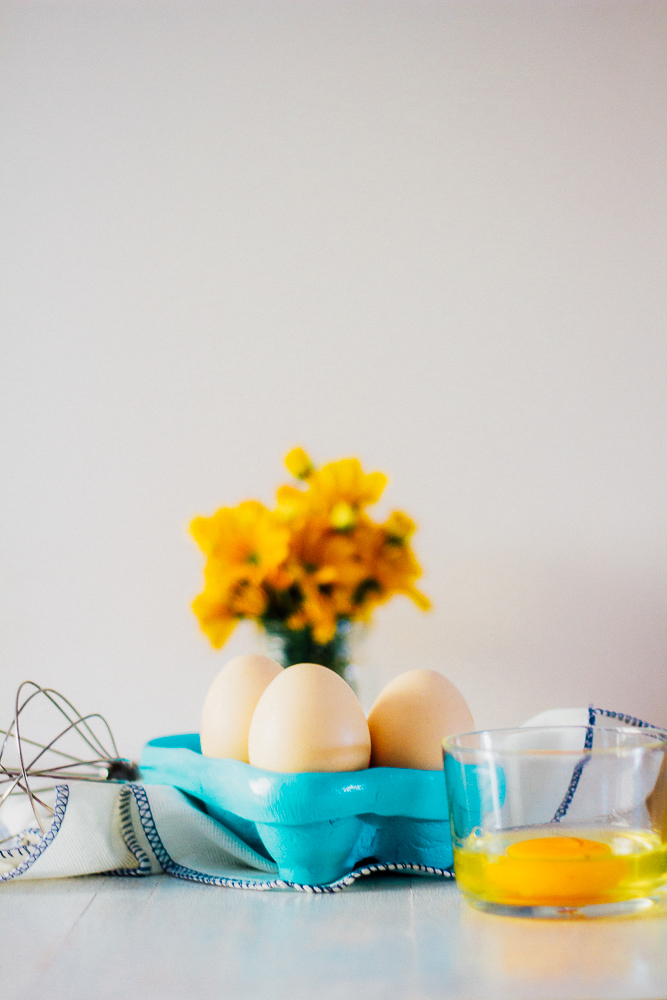
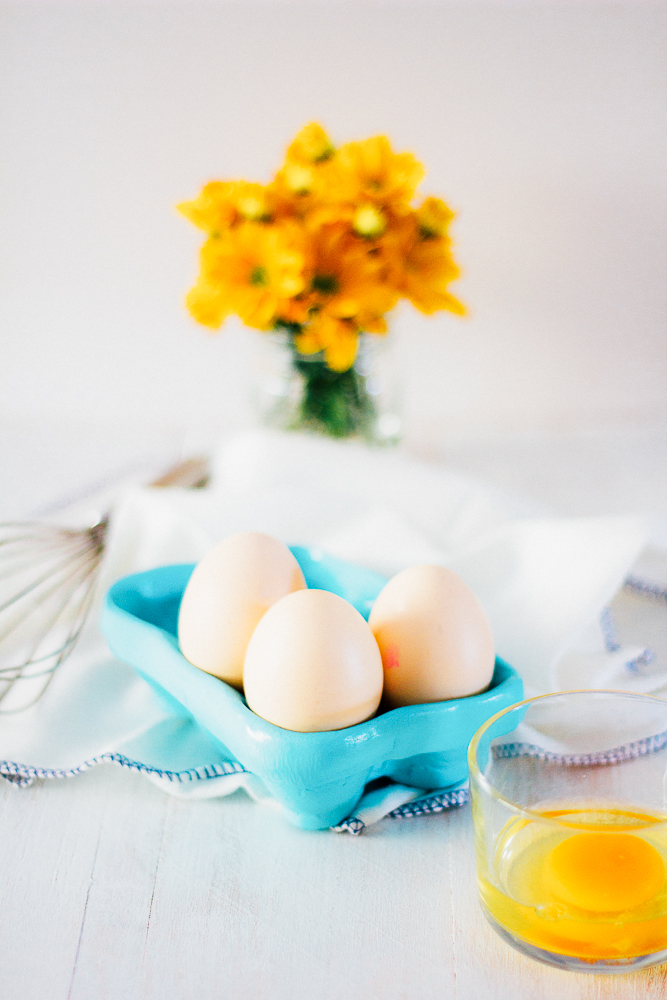
When it come to baking, it is best to use room temperature egg. Thus we don’t know where could we put the eggs as we usually leave them in the fridge. So rather than buying the egg with the cardboard carton that I’ll have to force ourselves to throw out once it couldn’t be used we made this instead – DIY Clay Egg Crate. Something to help me hold all the eggs and as a decorative accessories for our kitchen.
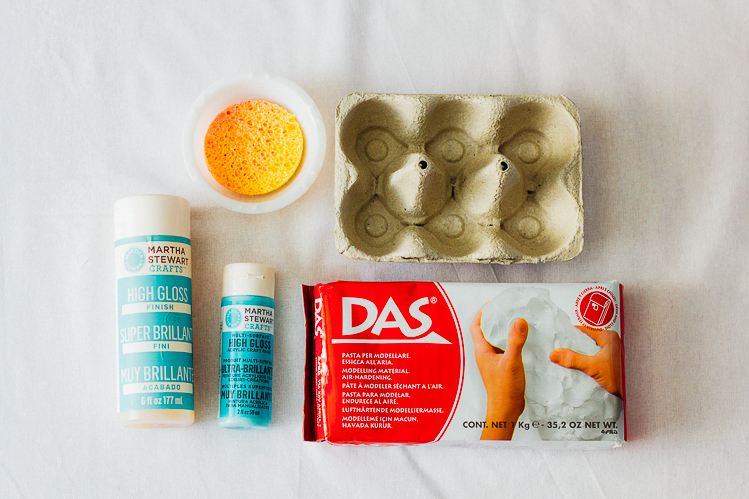
SUPPLIES
- Cardboard egg holder (keep it when you purchase of eggs, preferably to be cardboard materials)
- DAS modeling clay (air hardening)
- Containers (for the painting use)
- Sponge / Brush
- Martha Stewart Craft – Acrylic paint
- Martha Stewart Craft – High Gloss Finish
DIRECTIONS
Cut the excess from off the egg carton until you have the basic shape and roll out your clay.
Lay the clay over the carton and starting in the middle begin to press into the spaces. Don’t worry if you make holes. You can patch these up later.
Once you have the basic shape you need to smooth all of the clay with water. I spent about half an hour just going over to make this as smooth as possible at this stage. This will save you time sanding later!
Leave to dry overnight and then peel off the cardboard from the bottom of the clay. Now sand down the edges, inside, and bottom of the clay carton. Sharpen the edges and smooth the rounded parts.
Paint on a few layers of varnish and leave to dry. Your carton is ready to display your decorated eggs or your jewelry collection. Which ever you wish!
This egg crate is simple and fun to make with the little kids at home. You just have to mold it in shape, dry it and paint it into the color that you like. You can even paint it into chalkboard and have fun writing things on it.
Make them take a photo, send us an email, tag us on Instagram, tweet us, anything. More stories on our #stellerstories, we want to see yours! It would make the day!
xoxo, Joe.


No Comments