

So, it’s always a pleasant surprise when I find some new material or media I’ve never seen before, and to think of all kinds of cool stuff to do with it. This holiday season, it was the papier-mache cone.
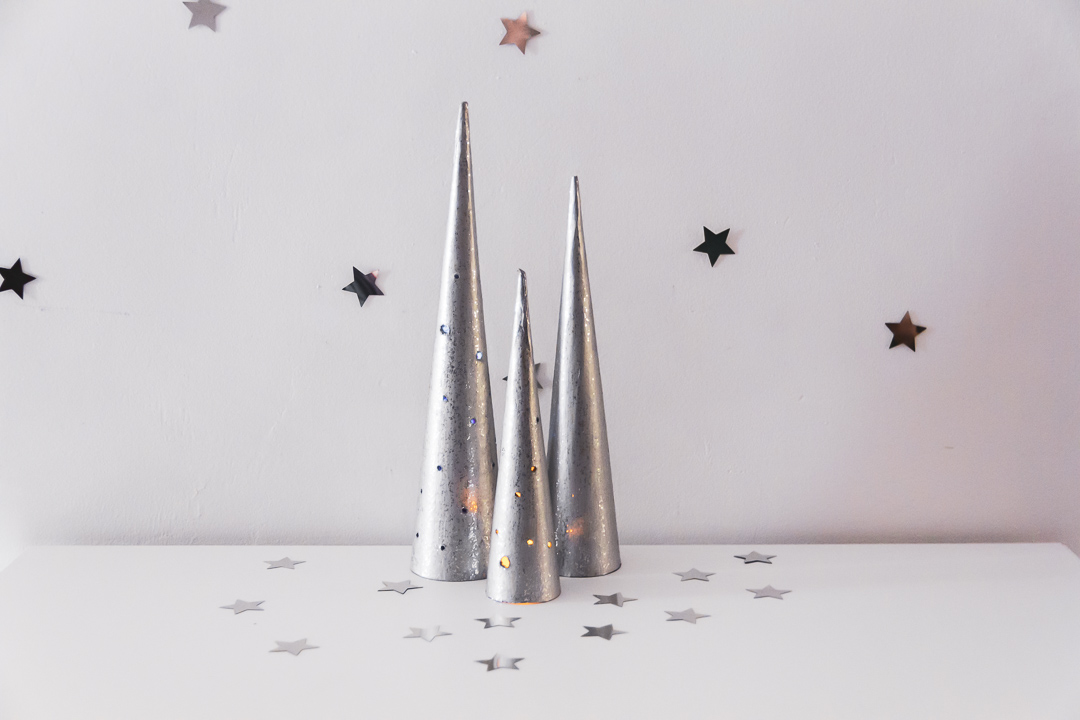
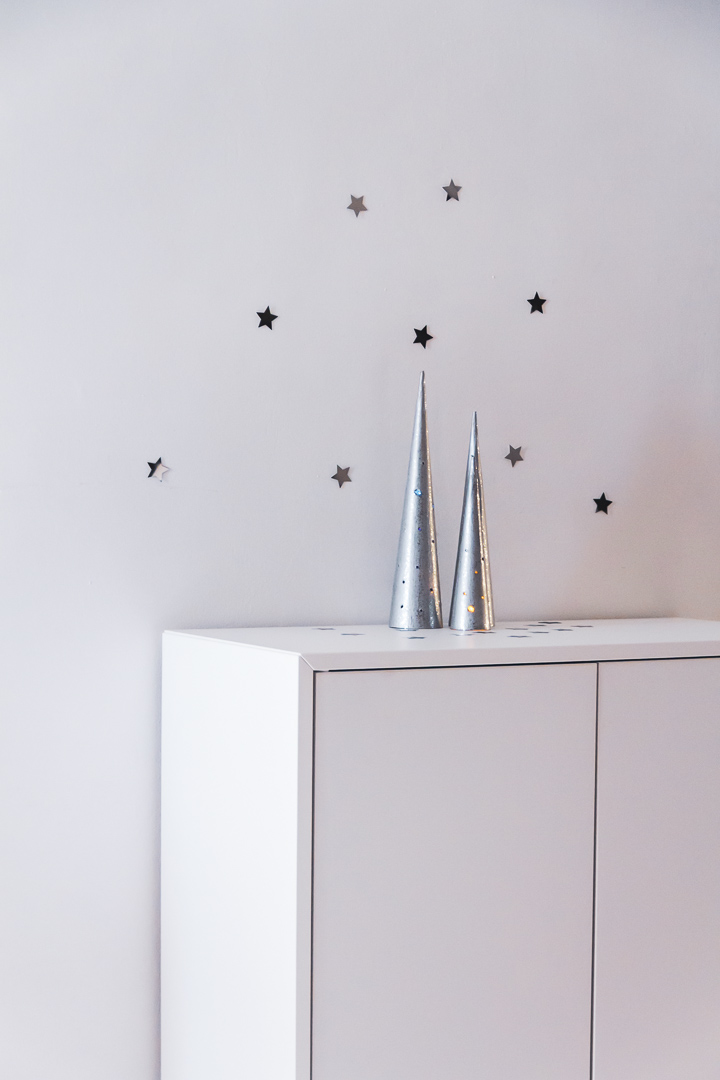
So, I was inspired bysome little porcelain trees from West Elm, which are now…sold out! (And were…pricey!) No matter, we’re gonna make out own by the dozens, for less than $1.00 a piece.


Begin by chucking two-three small bits into your drill, and start making holes in a random pattern. We chose to make mine a little more dense and the bottom, and let them thin out towards the top. As you see in the photo, drilling into paper doesn’t always leave a smooth hole, but it can be smoothed out with sandpaper.


If you happen to have a rounded bit, you smooth out the holes while maintaining the circular shape. If not, use a pencil or small dowel rod with the sandpaper to make everything smooth.


We painted our tree 2 coat of glossy silver paint and a coat of sparkling silver paint. Make sure you let them dry totally in between each coat. (It is like painting your nails, you doesn’t want to waste your time.)
Materials |
- Papier-mache cones, available in the doll making section of the craft store
- Electric drill and assorted drill bits
- Fine-grit sandpaper
- Gloss silver paint
- Gliter silver paint
Paint brush
Method |
Begin by chucking two-three small bits into your drill, and start making holes in a random pattern. We chose to make mine a little more dense and the bottom, and let them thin out towards the top. As you see in the photo, drilling into paper doesn’t always leave a smooth hole, but it can be smoothed out with sandpaper.
If you happen to have a rounded bit, you smooth out the holes while maintaining the circular shape. If not, use a pencil or small dowel rod with the sandpaper to make everything smooth.
We painted our tree 2 coat of glossy silver paint and a coat of sparkling silver paint. Make sure you let them dry totally in between each coat.
That’s it. You can make a whole whimsical forest of these guys is not much more time and for around a dollar a piece. For an extra punch, use a few LED tea lights to make ’em glow with holiday cheer!
Take a photo of your version, send us an email, tag us on Instagram, tweet us, anything. We love to see you trying out our recipe!
xoxo, Joe


No Comments